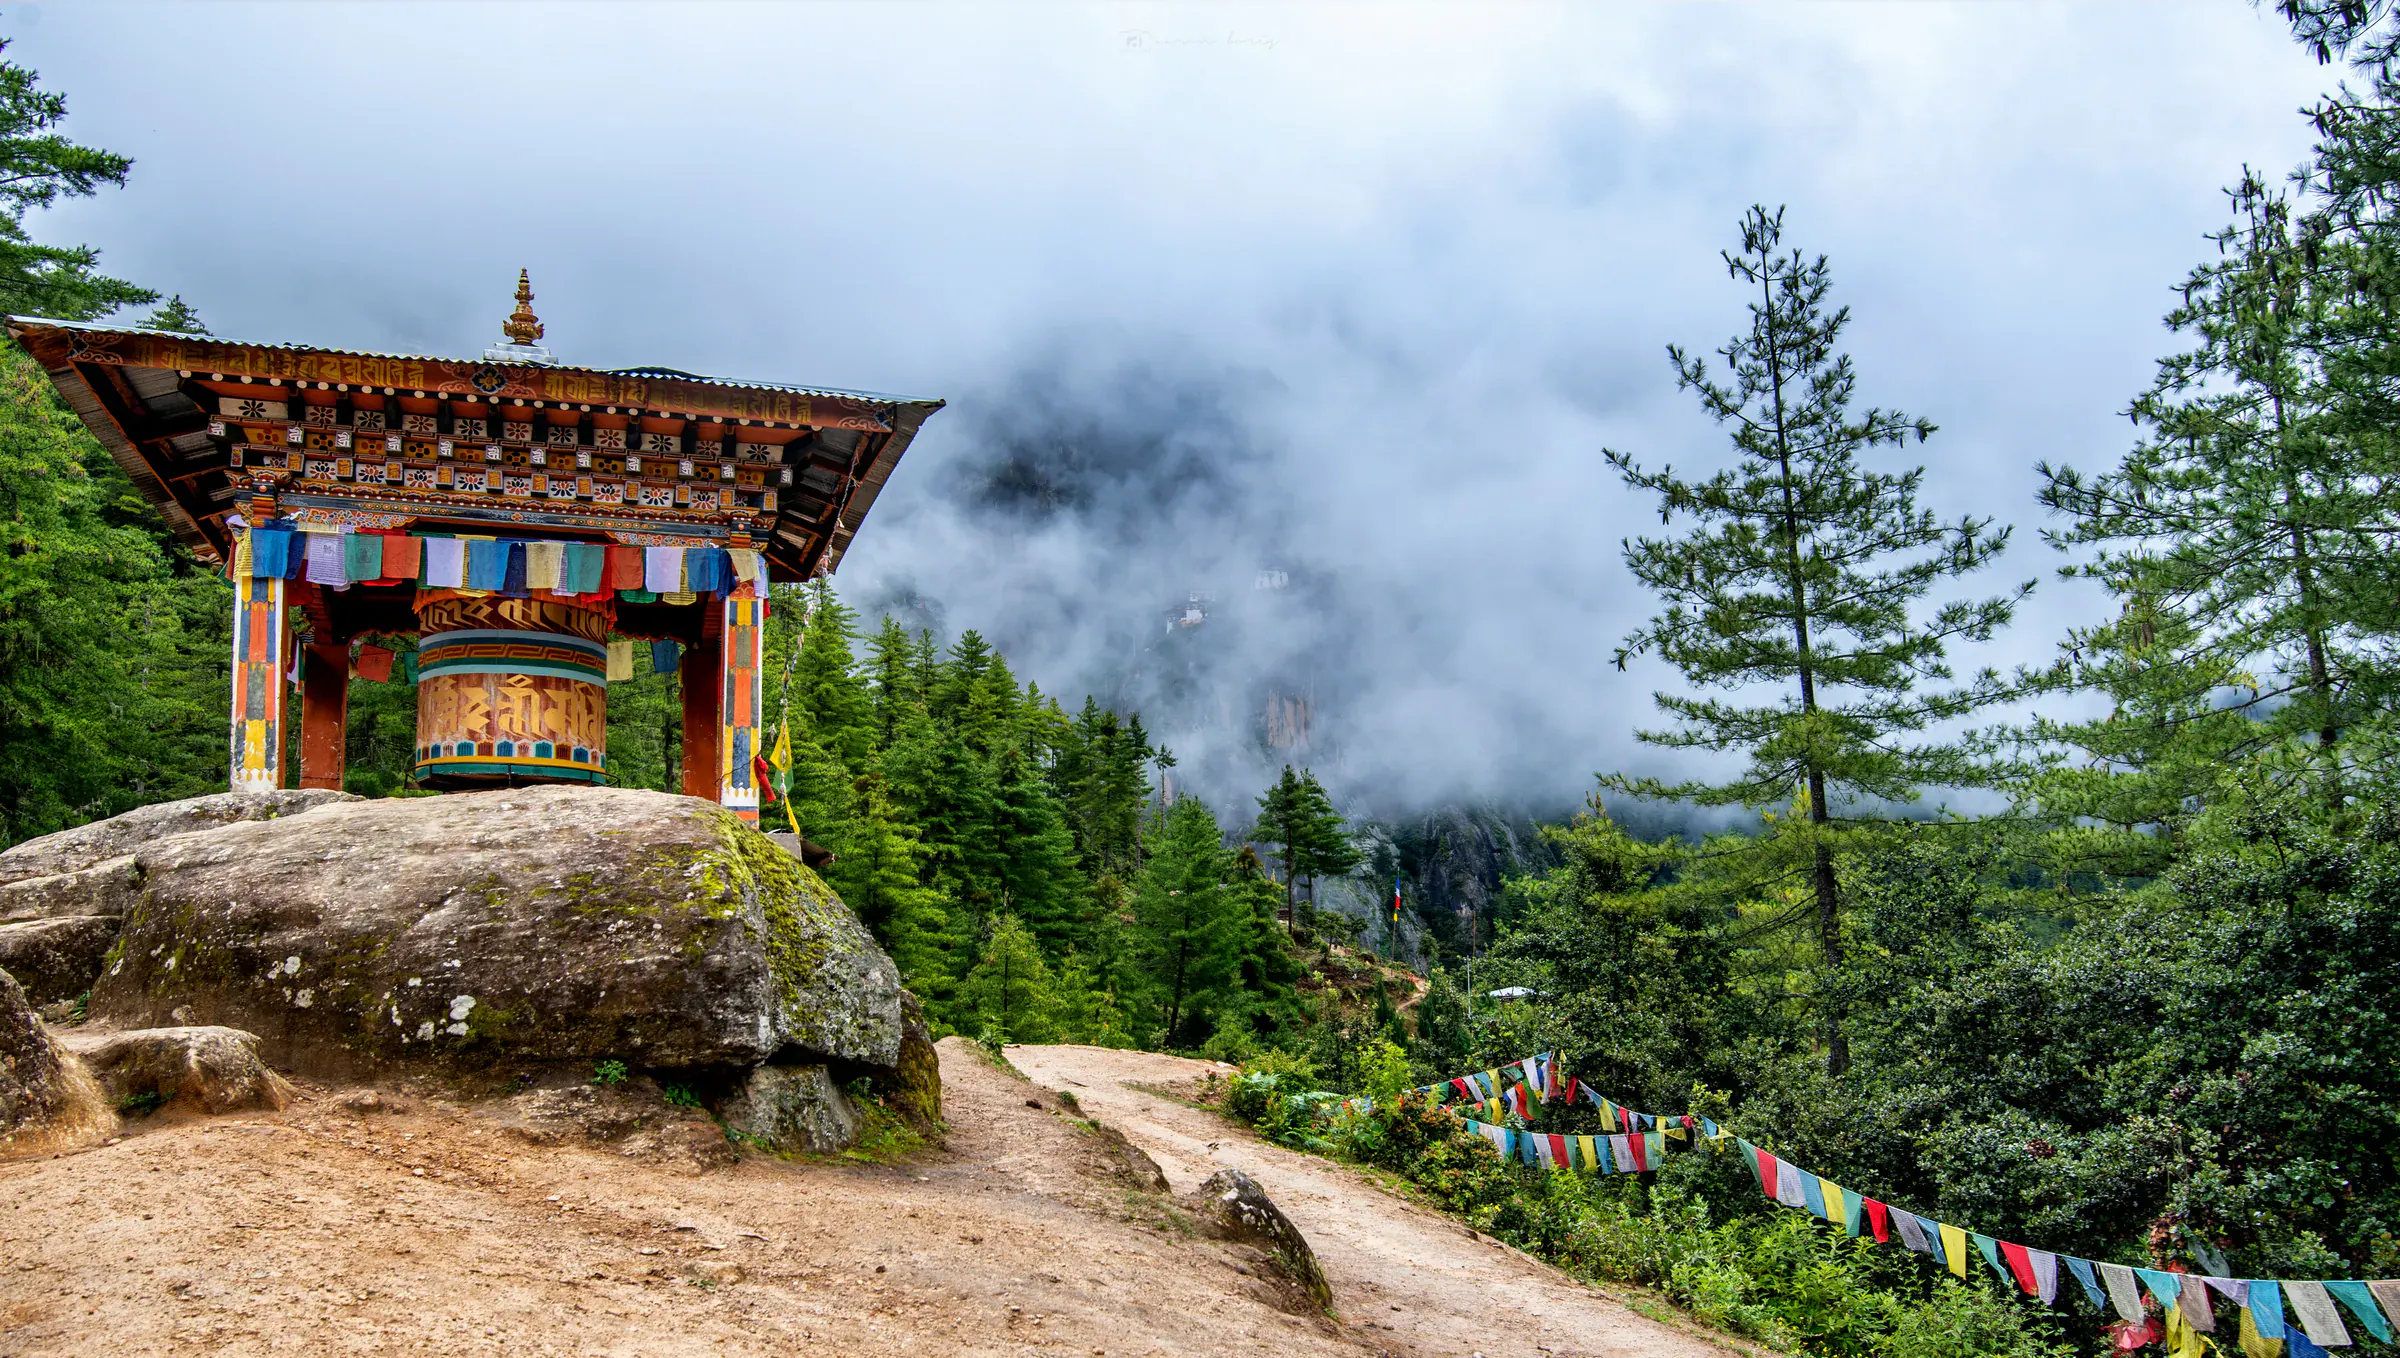
Tiger's Nest at a Glance
- Distance
- ~6 km round trip
- Elevation gain
- ~700-900 m (depending on starting point)
- Monastery elevation
- 3,120 m / 10,240 ft
- Total time
- 4-6 hours round trip (including time inside the monastery)
- Difficulty
- Moderate, accessible to most reasonably fit adults, but not trivial
- Best time of day
- Start by 7-8 AM
- Best season
- Late September to mid-November, or March to early May
Tiger's Nest Monastery, properly called Paro Taktsang, clings to a sheer cliff face about 900 metres above the Paro Valley floor. Plan for the climb, the final steps and time inside the monastery before deciding where it fits in your trip.
The Legend
In the 8th century, Guru Rinpoche (Padmasambhava) is said to have flown to this cliff on the back of a flying tigress to subdue local demons and bring Buddhism to Bhutan. He then meditated in a cave at the site for three years, three months, three weeks, three days, and three hours, a sacred numerology that recurs throughout Tibetan Buddhism.
The monastery itself was built around the meditation cave in 1692 by Gyalse Tenzin Rabgye. A devastating fire destroyed much of the original structure in 1998; what stands today is the careful reconstruction completed in the early 2000s.
How Difficult Is the Tiger's Nest Hike, Really?
Expect a sustained uphill walk followed by a descent on uneven ground. The altitude and final stone steps can make it tiring even if you walk regularly:
- 6 km round trip (3 km each way)
- 700-900 metres of elevation gain (a steep but steady ascent)
- The trail is well-maintained, wide dirt paths and stone steps, no scrambling
- The final stretch involves ~700 stone steps down into a gorge and back up to the monastery
- The starting elevation is already 2,400 m, and the monastery sits at 3,120 m, altitude makes it feel harder than the metres suggest
Think about your experience of walking uphill for several hours and descending steps. Comparisons with other famous hikes can be misleading because weather, altitude and pace differ.
Who can do it:
- Most reasonably fit adults
- Children who already enjoy sustained uphill walking and can manage uneven steps safely
- Older travellers with preparation and pacing
- Anyone with significant cardiovascular or respiratory issues should consult a doctor before attempting
Who should be cautious:
- Travellers with serious knee issues, the descent is hard on joints
- Anyone newly arrived from sea level, give yourself 24-48 hours in Bhutan before attempting
- Pregnant travellers, consult your doctor; the altitude is non-trivial
Can Children Hike to Tiger's Nest?
There is no single minimum age that tells you whether the walk will suit your child. Fitness, confidence on steps, patience, and experience walking uphill matter more than the number on a passport.
The official Bhutan Travel family guide describes the climb as a steady two-hour ascent to roughly 10,000 feet. That is a useful headline, but families should plan for longer. Children stop more often, the viewpoints invite breaks, and the final stone steps can feel very different after the first part of the climb.
Before committing to the full monastery, ask four questions:
- Can the child walk uphill for two to three hours without being carried?
- Can they descend long sections of uneven stone steps with control?
- Will they follow instructions near exposed viewpoints and crowded sections?
- Can one adult turn back with them without spoiling the day for the rest of the family?
If the answer to any of those is uncertain, plan the cafeteria as the first goal rather than the monastery. The view is rewarding, there are toilets and refreshments, and the family can decide there whether to continue.
The horse option has limits
Horses travel only from the trailhead to around the cafeteria. They do not continue to the main viewpoint or monastery. The final approach, including the stone steps down to the waterfall and back up, must be completed on foot.
This makes a horse useful for reducing the first climb, but it is not a complete alternative for a child who cannot manage the final steps. It is also better arranged with your guide, who can assess trail conditions and explain how the horses are operating that morning.
A sensible family plan
- Start early, before the trail becomes warmer and busier
- Put Tiger's Nest late enough in the itinerary for basic acclimatisation
- Carry familiar snacks, water, a warm layer, and a rain shell for each child
- Let children set a steady pace instead of repeatedly asking them to catch up
- Agree in advance that the cafeteria or main viewpoint can be the finish line
- Keep the afternoon empty
Reaching the monastery is not the only successful version of the day. A calm walk to a good viewpoint can be a better family memory than forcing the final section.
For the wider route, rooms, road days, and child SDF, read our Bhutan with kids guide or use the family trip planner.
The Trail, Stage by Stage
Stage 1: Trailhead to First Viewpoint (1-1.5 hours)
The trail starts at a small parking area with vendors selling walking sticks and snacks. The first section climbs through blue pine forest and passes prayer flags along the trail. You'll gain roughly 350 metres in this stretch, the steepest sustained section of the entire hike.
About 45-60 minutes in, you reach the first viewpoint, the monastery becomes visible across the valley for the first time. This is where most people stop for photos and water.
Stage 2: First Viewpoint to Cafeteria/Teahouse (~30 minutes)
A relatively gentle continuation through the forest brings you to Taktsang Cafeteria, a teahouse roughly halfway up. Most groups stop here for tea, snacks, and toilets. Many visitors who can't continue stop here permanently, the view of the monastery from this point is excellent.
This is also as far as horses can take you. The horses can be hired at the trailhead and carry you to the cafeteria, but they cannot continue beyond this point, the rest must be done on foot.
Stage 3: Cafeteria to Main Viewpoint (45 minutes - 1 hour)
The trail continues climbing more gradually past the cafeteria, reaching the famous main viewpoint, directly across the chasm from the monastery. This is the spot where every classic Tiger's Nest photograph is taken. Allow time here.
Stage 4: Viewpoint to Monastery (30-45 minutes)
The final stretch is the most dramatic and physically taxing in concentrated form. You descend ~100 metres on stone steps into a gorge, cross a small wooden bridge beside a waterfall, and then climb ~100 metres back up the opposite cliff face on more steps to reach the monastery entrance.
Roughly 700 steps in total in this final section. The descent into the gorge is hard on knees; the ascent on the other side is hard on lungs at altitude. Take it slow.
Time at the Monastery (45 minutes - 1 hour)
Plan to spend at least 30 minutes inside the temple complex, longer if you want to fully experience it. Then it's the same route back down, typically faster (1.5-2 hours total descent) but harder on knees.
Total realistic time: 4-6 hours from trailhead back to trailhead, depending on pace, photo stops, and time at the monastery.
What to Pack (and Why)
Pack for a long walk, changing weather and the monastery's dress requirements:
| Item | Why |
|---|---|
| Hiking shoes or proper trail shoes | Choose shoes with grip for uneven dirt and stone, and wear them in before the trip. Avoid flip-flops and smooth soles. |
| Long trousers | Required to enter the monastery (covered knees). Save the changing-into-pants step by wearing them on the hike. |
| A modest top with sleeves | Same reason, covered shoulders required to enter the monastery. Layered breathable fabric ideal. |
| Light jacket or fleece | Mornings are cold even in summer; afternoons can be cool at the monastery's altitude. |
| Rain jacket / poncho | Even in dry season, mountain weather changes fast. A light packable shell is enough. |
| Drinking water | Carry enough for the walk and discuss refill stops with your guide. Drink regularly without forcing excessive amounts. |
| Sunscreen and sunglasses | The high-altitude sun is strong even when temperatures feel mild. |
| A hat | Sun protection, but you'll need to remove it inside the monastery. |
| Snacks | Energy bars, nuts, dried fruit. The cafeteria has limited food. |
| A small day pack | To carry everything. Should fit in monastery storage when you arrive. |
| Walking stick or trekking poles | Hugely helpful on the descent, especially if you have any knee issues. Bamboo sticks are sold cheaply at the trailhead. |
| Cash for the cafeteria, horse, and tips | Ask your guide about current costs before leaving the hotel, particularly if arranging a horse. |
What NOT to bring inside the monastery:
- Cameras and phones, must be left in the security lockers at the monastery entrance
- Bags, also stored in lockers
- Hats, removed before entering
- Anything leather (some old strict observances; your guide will advise)
Take photographs on the trail where permitted, then follow the storage instructions at the entrance.
Inside the Monastery: What to Expect
The monastery complex contains four main temples built across multiple levels of the cliff. Once you enter (after the security check), you'll move clockwise through:
- The original meditation cave of Guru Rinpoche, the sacred core of the entire site
- Multiple statue rooms with butter lamp offerings, painted murals, and ancient relics
- Open-air balconies with the same valley views you've been climbing toward, but from inside the cliff structure
- A small sacred lake on a lower level (depending on which sections are open that day)
The total interior visit takes 30-60 minutes depending on how reflective you want to be about it. Many visitors light a butter lamp as an offering. Your guide will explain what you're seeing, much of the iconography is dense and rewards interpretation.
Photography is not permitted inside. Follow your guide's instructions and leave your camera and phone in the designated storage.
When to Go
Time of day
Start by 7-8 AM. Reasons:
- The trail is significantly cooler in the morning
- Crowds build dramatically after 9 AM, by 10 AM the cafeteria is packed
- Mountain weather is most stable in the morning; afternoons can bring clouds and rain even in dry season
- Light for photography is best in the first 2-3 hours after sunrise
A 7 AM start gets you to the monastery by 10 AM and back to the trailhead by 1-2 PM.
Time of year
| Season | Conditions | Verdict |
|---|---|---|
| Spring (March-May) | Clear views, blooming rhododendrons, pleasant temperatures | Excellent |
| Summer (June-August) | Monsoon rains, slippery trail, low cloud may obscure the monastery | Avoid if possible |
| Autumn (September-November) | Often clearer views and drier walking conditions | Ideal |
| Winter (December-February) | Cold, occasional snow on upper trail, possible ice on stone steps | Doable for prepared hikers; check conditions with guide |
If you have flexibility, late September through mid-November is the best window, clearest skies and most stable weather.
Altitude Notes
Tiger's Nest tops out at 3,120 m. Most visitors don't experience serious altitude sickness, but the elevation does affect performance:
- Plan it for day 2-3 of your trip: not day 1. Give yourself at least one full day in Paro (2,200 m) to acclimatise before attempting.
- Drink regularly, without forcing excessive water
- Pace yourself: slow steady progress beats stop-start sprinting at altitude
- Avoid alcohol the night before
- Eat a proper breakfast: your body works harder at altitude
Tell your guide if you develop a headache, nausea or dizziness, and stop ascending. Descend if symptoms worsen; breathlessness at rest, confusion or difficulty walking need urgent medical attention. Read the CDC's altitude advice before travelling, and discuss relevant health conditions with your doctor.
Photography Tips
The best Tiger's Nest photos come from specific spots:
- Main cliff viewpoint (Stage 3 endpoint): the iconic across-the-chasm shot. This is the photo you've seen on every Bhutan brochure.
- The cafeteria viewpoint: slightly further away but with a different framing through pine trees
- The waterfall bridge (Stage 4): the monastery looms above with prayer flags and water
- Just below the monastery entrance: looking back across the gorge
Lighting: the cliff face is in shadow until mid-morning. For the best-lit photo, the main viewpoint between 10-11 AM when the sun has cleared the surrounding ridges. Earlier you get atmospheric mist; later you risk afternoon clouds.
Lens: a moderate zoom (24-105mm equivalent) covers everything. The monastery is small enough in the frame that ultra-wide doesn't help, bring something that can pull in detail.
Common Mistakes
- Starting too late. A 10 AM start means hiking the steepest section in the heat with the largest crowds.
- Skipping the acclimatisation day. Going straight from international flights to a 700-metre climb is a recipe for misery.
- Wearing the wrong shoes. Wear shoes with grip that you have already used on longer walks.
- Carrying expensive camera gear all the way up. It has to go in a locker at the monastery anyway. Bring what you need for the trail and viewpoints; leave the heavy stuff at the hotel.
- Not budgeting time for the inside. Many visitors race to the monastery entrance, take photos outside, and turn around. The interior is the spiritual experience, give it time.
- Underestimating the descent. Going down is faster but harder on knees. Trekking poles help a lot.
- Trying to photograph inside. Leave your camera in storage and follow the monastery's rules.
Combining Tiger's Nest with the Rest of Paro
A full Tiger's Nest day is your morning + early afternoon. By the time you're back in town, you'll want a relaxed afternoon and evening:
- Traditional Bhutanese lunch in Paro town, your guide can arrange this
- Hot stone bath: a Bhutanese tradition where heated river stones are placed in a wooden tub of mineral water with medicinal herbs. Restorative after the hike, and uniquely Bhutanese.
- Paro Dzong: only 10 minutes from town; a relaxed afternoon visit
- National Museum (Ta Dzong), adjacent to Paro Dzong, manageable in 1-2 hours
Most quality Bhutan itineraries reserve the Tiger's Nest day specifically and don't try to schedule anything demanding around it.
Ready to Plan?
Tell us whether you want to include Tiger's Nest and how comfortable you are with the walk. Your guide can help with timing and explain the monastery, or plan a shorter walk or another activity if the full hike doesn't suit you.
- The Essential Bhutan Journey: 7 days, includes Tiger's Nest as a day-2 highlight
- Bhutan Culture & Nature Escape: 10 days, includes Tiger's Nest with a full extra day in Paro for acclimatisation
- Bhutan Festival Journey: 9 days, festival days plus Tiger's Nest
- Family trip planner: child pricing, family pacing, and room options in one place
Or request a family quote if you want a slower pace and a clear fallback plan for the hike.
Trail conditions and monastery access are subject to weather, religious observances, and conservation closures. Your guide confirms the day's plan based on current conditions.